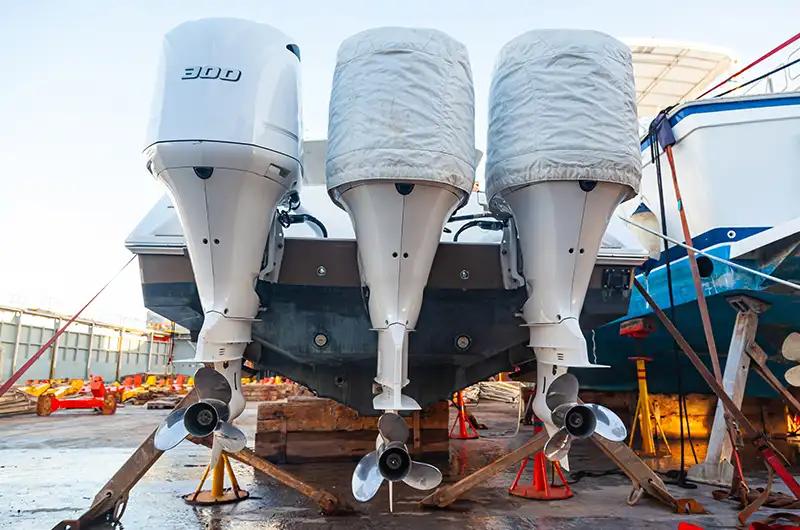
Winterizing your outboard is the cheapest insurance you can buy against cracked blocks, gummed-up carbs, and spring-time headaches. A Saturday afternoon, a few gallons of antifreeze, and some fresh oil can protect your motor all winter—and pay you back with a quick, worry-free launch next season.
Why Winterize at All?
Cold snaps can split aluminum housings, stale fuel can varnish injectors, and “dirty” oil can etch bearings while the boat sits unused. In a single hard freeze—even in normally mild regions—residual cooling water can expand and fracture the power-head casting, a repair that often costs more than the engine is worth. Stabilized fuel, fresh lubricants, and corrosion blockers stop that damage before it starts.
Gear You Need Before You Begin
Think of winterization as a short tool list—not rocket science:
| Essential | Why It Matters |
| Non-toxic marine antifreeze (propylene glycol) | Displaces raw water and won’t harm gaskets. |
| Fuel stabilizer | Keeps gas from turning gummy after 30 days. |
| Fogging oil | Coats cylinder walls to block rust. |
| Gear-lube pump & 80W-90 lube | Prevents water-contaminated oil from freezing in the lower unit. |
| Basic hand tools, spare filters, and grease gun | Lets you swap filters and hit every zerk fitting. |
Lay everything out; nothing slows a project like hunting for a forgotten wrench.
Step-by-Step Winterization Roadmap
1. Stabilize and Circulate Fresh Fuel
Fill the tank 95 percent full with fresh, ethanol-free gas. Add the manufacturer’s recommended dose of marine stabilizer, then run the engine 10 – 15 minutes on the hose so treated fuel reaches injectors and carbs. A full tank leaves little room for moist winter air that can condense into water.
2. Change the Engine Oil and Filter (Four-Strokes)
“Dirty” oil carries acids that chew soft bearings all winter. Warm the engine on a hose, shut it down, and drain the crankcase. Install a new OEM filter and refill with outboard-rated oil of the weight listed in your owner’s manual. Run the motor for a few minutes to circulate fresh oil and check for leaks.
3. Drain and Refill Lower-Unit Gear Oil
Remove the bottom drain plug first, then the vent plug above it. Milky oil = water intrusion; fix seals before spring. Pump fresh gear lube from the bottom up until it spills from the top hole. Replace plugs with new gaskets to keep water out.
4. Flush Cooling Passages and Add Antifreeze
Attach flushing muffs, run the motor to operating temp, then shut it off. Swap the garden hose for a winterizing kit filled with -50° F (or colder) rated propylene-glycol antifreeze and restart the engine. When pink fluid flows from the tell-tale, the block is protected.
5. Fog the Cylinders
With the cowl off, spray fogging oil into the air intake on carbureted motors while the engine idles. Expect sputtering and white smoke – that’s normal. For EFI or DFI motors, follow the service-manual method of pulling fuel through a portable tank premixed with fogging oil designed for injectors. When thick smoke appears, kill the ignition.
6. Grease and Protect
- Pump marine grease into every zerk: steering, pivot, and tilt tubes.
- Spray an anti-corrosion inhibitor over the power-head and lower unit.
- Fill the two-stroke oil tank to prevent condensation.
7. Battery, Prop, and Trailer Checks
- Charge the starting battery, disconnect the leads, and store it in a cool, dry place – on a maintenance charger if possible.
- Pull the prop, inspect for fishing-line on the shaft, and coat splines with fresh grease.
- If you trailer, chock wheels and block them off the ground to prevent flat spots.
Two-Stroke vs. Four-Stroke: What Changes?
- Oil Change: Only four-strokes need crankcase oil service.
- Fogging: Two-strokes already carry oil but still benefit from a light fog to protect rings.
- Fuel: Both power-plants suffer if ethanol separates during long storage—stabilizer is mandatory.
DIY or Pro Service?
If your motor is new and under warranty, many owners choose a certified shop for the paper trail. Expect the yard to bundle winterization with impeller service and any recall checks. Handy skippers can tackle the job at home; just keep receipts for parts in case warranty questions pop up.
Off-Season Quick-Glance Checklist
Before Your Last Run
- Add fuel stabilizer.
- Note any odd noises to fix later.
Back at the Dock
- Flush, fog, and drain.
- Change oils and filters.
- Grease, spray inhibitor, remove prop.
Storage Day
- Trim motor fully vertical so any water can drain.
- Charge and remove battery.
- Label maintenance date on cowling with painter’s tape.
Tape the checklist inside your dock box—next fall you’ll thank yourself.
Spring-Launch Prep Starts Now
A properly “put-to-bed” outboard wakes up happy: swap spark plugs, reinstall the prop, charge the battery, and you’re fishing while neighbors wrestle with seized pumps. Spend more time scouting the flats—less time at the ramp.
When Plans Change, Sea Tow Has Your Back
Even the best-maintained engines can falter after months ashore. If your first trip of the season falls flat, tap the Sea Tow® App and enjoy 24/7 towing, fuel delivery, and on-water troubleshooting from local Captains who know your home waters.
