 800-4-SEATOW
 Service Locator
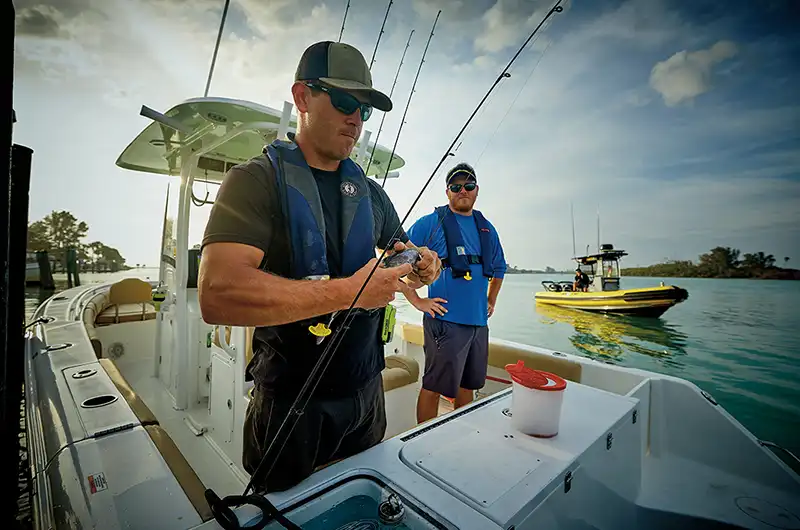
There’s no time like the present to brush up on your fishing knots! Whether you’re an old salt who knows the ropes or new to the water and need help getting started, here are six lessons on how to tie.
The Uni Knot: for line to spool
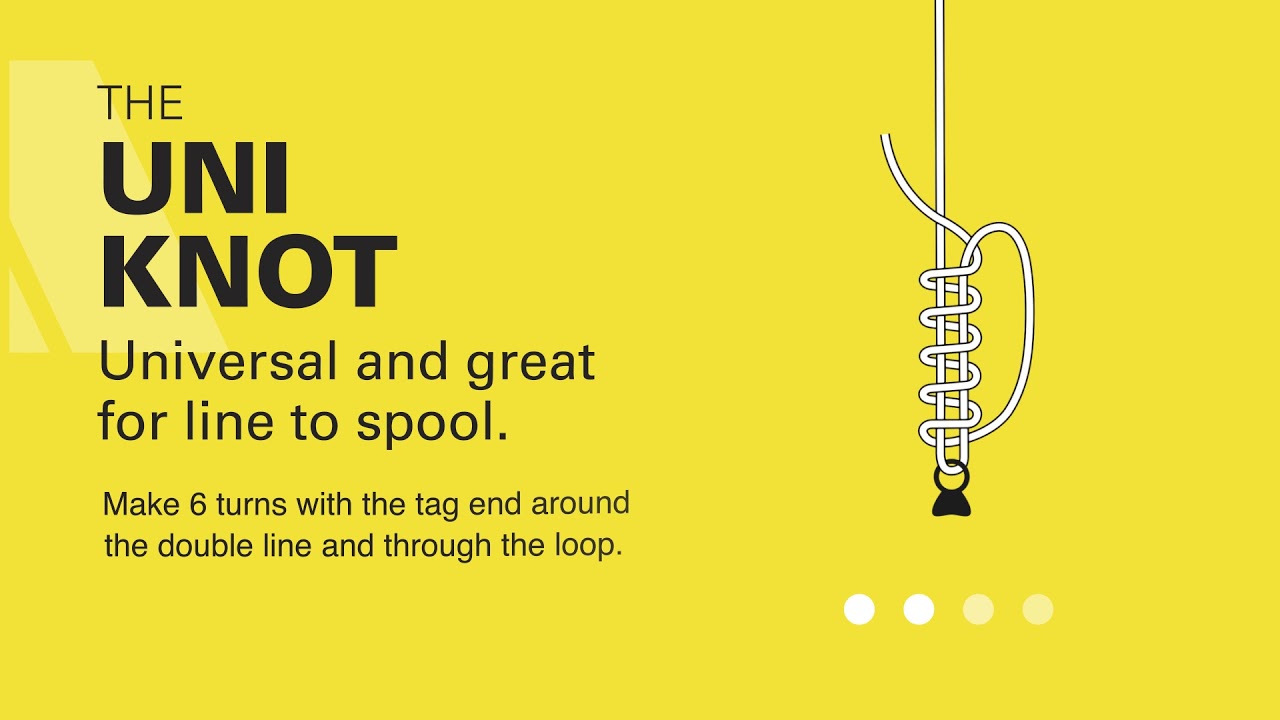
Uni knots are great for attaching your main line to a spool, tying on lures or swivels. The Uni Knot retains nearly 100% line strength and works with mono, flouro, and braided lines..
How to:
- Create a loop: Pass the tag end through the eye of your lure or spool arbor, then double back so you form a loop alongside the standing line.
- Wrap: Make 5–7 tight turns with the tag end around both the loop and main line.
- Dress & snug: Moisten the wraps with saliva or water. Pull the tag end to tighten the coils, then pull the standing line to slide the knot down.
- Finish: Trim the tag end close to the knot.
Pro Tips:
- 6 turns is ideal for monofilament; braided line may need 8–10 wraps.
- Always wet the knot before final tightening—dry friction can weaken the line by up to 20%.
- Slide the knot gently; a jerk can deform it and reduce strength.
The Double Uni Knot: for Joining Two Lines
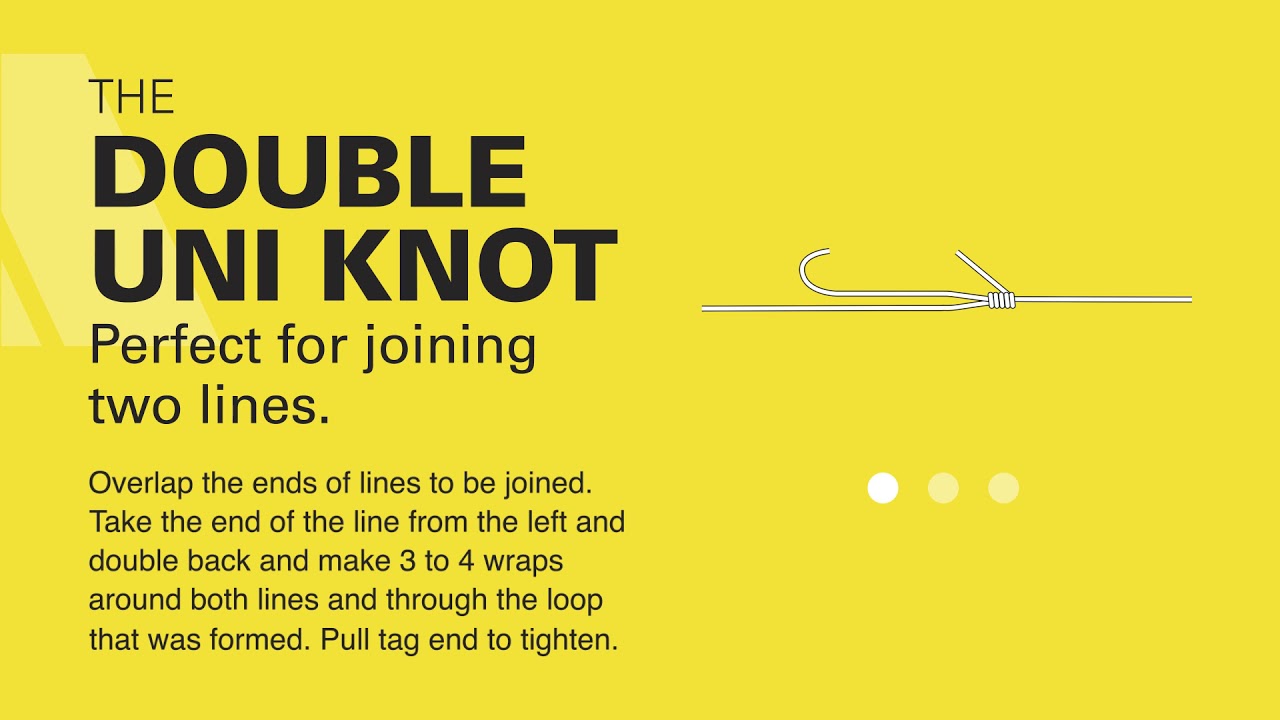
Used for joining two lines of similar or dissimilar diameters—perfect for mono-to-fluoro or backing on braid.
How to:
- Overlap: Lay 6–8 inches of each line alongside each other.
- First uni: Take the tag end of Line A, form a loop around Line B and itself, make 3–5 wraps, then pass the tag end back through the loop and snug up.
- Second uni: Repeat with Line B’s tag end around Line A.
- Close: Moisten, then pull both standing ends to draw the two knots together, creating a neat “barrel.” Trim both tag ends.
Pro Tips:
- For power fishing (heavy jigs), use only 3 wraps to keep the knot compact.
- Wet both knots thoroughly before tightening to preserve line integrity.
- Check for slippage by giving each standing line a firm tug before you fish.
The Improved Clinch Knot: For Simple Like to Tackle
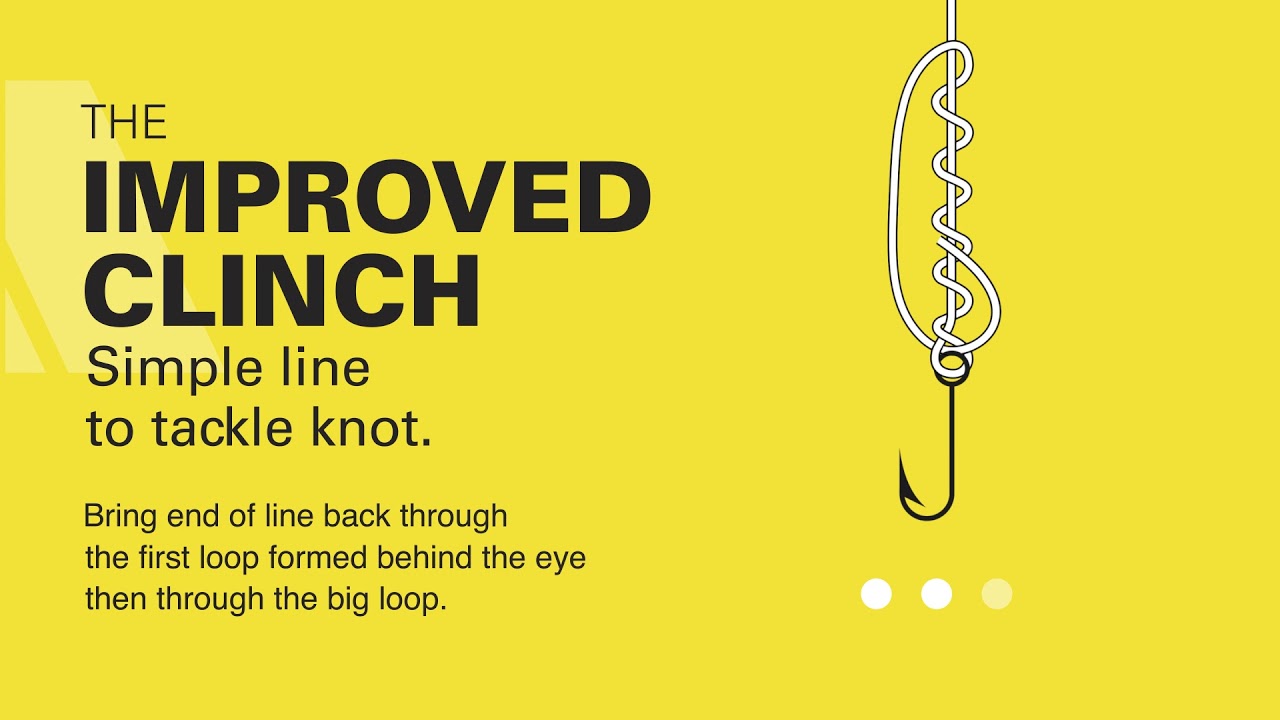
Good at securing monofilament line to hooks, swivels, or snaps; a classic “go-to” for almost any rig.
How to:
- Thread: Pass the tag end through the eye, leaving 6–8 inches to work with.
- Wrap: Wrap the tag end 5–7 times around the standing line.
- Loop back: Pass the tag end back through the small loop just above the eye, then through the large loop you’ve formed.
- Tighten & trim: Moisten, pull the tag end to snug the wraps, then pull the standing line to seat the knot against the eye. Trim close.
Pro Tips:
- For smaller hooks (size 12–20), reduce to 4 wraps to keep the knot small.
- If you notice any line cutting into itself, replace with a Trilene Knot—another “improved clinch” variant.
- Always inspect the knot before each cast; waterlogged line can slip over time.
For tips and ways you can apply these fishing knots, click here.
sea tow will keep you fishing
Whether you fish inshore or offshore, Sea Tow Captains are standing by to help keep you fishing. As the premier leader in on-water assistance, members pay one annual rate and receive the most comprehensive member benefits available. Membership includes a full suite of on-water assistance services for every boat you own, rent, or bareboat charter. Learn more about our membership options today. To find the Sea Tow closest to you, use our service locator or call our Customer Care Center at 800-4-SEATOW.

Sea Tow Team
Sea Tow has been the premier leader in on-water boating assistance since 1983. We want to share news, press, tips and all things boating.