 800-4-SEATOW
 Service Locator
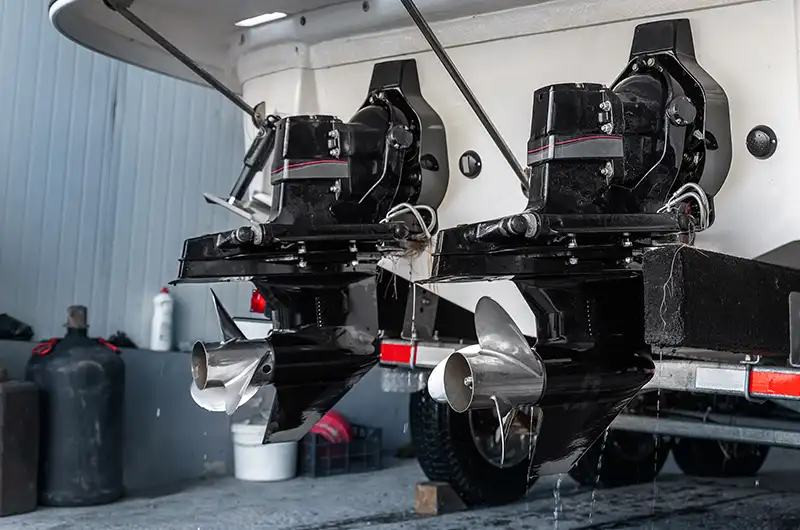
Winterizing an inboard boat motor is largely about three things – keeping water from freezing inside the engine, protecting internal parts from corrosion and gunk, and making sure the boat fires up the first time next spring. By filling the fuel tank and stabilizing it, flushing and adding antifreeze to the cooling passages, fogging the cylinders, changing the oils, and sealing off openings, you can prevent the cracked blocks, rusty internals, and gummed-up fuel systems that lead to heart-dropping repair bills.
Follow the step-by-step game plan below, knock it out in an afternoon, and spend the off-season dreaming instead of worrying.
Why Winterizing Matters – Even for “Mild” Climates
A gas or diesel inboard lives on raw water. That water sits in jackets, pumps, and hoses long after you shut down. A single overnight freeze can expand that trapped liquid, split a cast-iron block, and turn a $10 jug of antifreeze into a $10 000 engine swap. Even if temps never reach 32° F, months of idle time invite rust, varnish, and fuel separation that can leave an engine coughing – or not cranking at all – come spring. Done right, winterization:
- Adds seasons to engine life
- Cuts spring commissioning costs
- Protects resale value
Step-by-Step Winterization Guide
Pro Tip: Keep a note pad in the cockpit. Jot each step as you finish so nothing gets missed when you’re tired and the sun is fading.
Step 1: Stabilize – and Fill – the Fuel
Running on a quarter-tank next April invites two nasty surprises: water from condensation and stale gas that clogs injectors. Top the tank until the nozzle clicks off, then add a dose of marine fuel stabilizer recommended by your owner’s manual. Run the engine for 10 – 15 minutes so the stabilizer reaches every line and injector.
Step 2: Warm It Up
Hook garden-hose “muffs” to the raw-water intake or keep the boat in the slings. Idle until the temperature gauge reaches normal. A warm engine:
- Opens the thermostat, so coolant reaches every passage
- Thins oil and contaminants for easier draining later
- Circulates stabilized fuel through carburetors or injectors
Step 3: Drain the Raw-Water Side
Once shut down, pull the engine and exhaust drain plugs – usually brass petcocks or hoses low on the block – and let gravity empty what it can. Some yards blow low-pressure air through the system to chase the last drops, but be warned even a tablespoon left behind can freeze.
Step 4: Protect with Marine Antifreeze
Re-install the drains. Drop the raw-water suction hose into a bucket of -100°F propylene-glycol antifreeze – the pink, non-toxic type safe for marinas – and fire the engine. Watch until pink fluid discharges from the exhaust for at least 30 seconds. That confirms every nook now contains protection and its ready to be shut down.
Step 5: Fog the Cylinders
Moist air inside cylinders equals flash rust. With the engine still warm:
- Remove the flame arrestor.
- Restart and throttle to a fast idle.
- Spray fogging oil in a steady stream until the engine stumbles and white smoke pours from the exhaust.
- Shut down at the first sputter.
Alternate method: Pull each spark plug, spray fogging oil directly into the hole, and reinstall the plug finger-tight.
Step 6: Change Engine and Gear Oils
Combustion by-products turn old oil acidic – bad news for bearings over a long lay-up. While the block is still warm:
- Pump out the crankcase and fill with the grade your manual calls for.
- Spin on a new filter pre-filled with fresh oil.
- Repeat for the transmission or V-drive gear lube.
Step 7: Inspect and Replace Wear Parts
With covers off, give the engine bay a five-minute health check:
- Hoses: Squeeze for soft spots, cracks, or bulges – especially hot exhaust elbows.
- Clamps: Tighten doubles that guard the raw-water line.
- Belts: Check tension and glazing.
- Fuel-water separator: Spin on a fresh element; cheap insurance against springtime phase-separation.
- Zincs: Replace anodes that are half-gone.
Log anything that needs parts ordered now, not in April.
Step 8: Seal and Secure
Moisture, animals, and dust attack from the outside:
- Tape plastic caps over the air inlet, exhaust outlet, crankcase breather, and transmission vent.
- Stuff steel wool in the rudder port and any cockpit drains mice can squeeze through.
- Lightly mist electrical connections with a corrosion inhibitor.
- Wipe exposed metal with a rag soaked in clean engine oil.
Step 9: Batteries and Electronics
Remove batteries and store them in a cool, dry room on a smart maintainer. If that isn’t possible, at least isolate them with the battery switch and top them off once a month. Pull multifunction displays and handheld VHF radios and keep them indoors.
Step 10: Final Walk-Through
Close seacocks unless the boat will stay in the water and requires circulation. Crack a deck hatch and cabin companionway to reduce mold-causing condensation. Secure the winter cover so wind can’t chafe gelcoat. Lastly, write a bright note and stick it to the helm: “REMOVE TAPE & SEACOCK PLUGS BEFORE LAUNCH.”
Frequently Asked Questions
What’s the difference between propylene-glycol and automotive antifreeze?
Automotive antifreeze (ethylene glycol) is toxic and only works in closed-cooling systems with heat exchangers. Most inboards use raw water, so always choose the non-toxic, pink propylene-glycol blend marked for marine engines.
My climate rarely drops below freezing. Do I still need antifreeze?
Yes. Residual water lies in low spots you can’t drain. A surprise cold snap – even into the mid-20’s overnight – can split iron. The added rust inhibitors in marine antifreeze also fight corrosion in salt-rich passages.
Can I skip the oil change and just do it in spring?
Leaving dirty oil inside for five months bathes bearings in acid and moisture. Change it now, then you only need a quick level check before splash-down.
Is fogging necessary on modern fuel-injected engines?
Absolutely. Fuel injection doesn’t coat cylinder walls with protective oil the way carburetors once did. A 30-second fogging spray adds the film that stops flash rust rings.
How long does the whole process take?
If you have tools and supplies on deck, plan on two to three hours for one engine, a bit more for twins. The cost is usually under $200 in supplies – far less than one hour of professional labor.
Tips from the Tow-Boat Pros
- Label everything. Use painter’s tape to mark hoses and bolts you remove so spring re-assembly is foolproof.
- Keep spares handy. A Racor Snapp filter with hose barbs can be plumbed in minutes if a filter housing cracks during winter draining.
- Carry an oil-absorbent pad. Catch the drips from filters and keep the bilge clean.
- Photograph each step. Cell-phone pictures beat memory when questions pop up months later.
- Store a “ditch list.” Note every vent and plug you capped and tape the list to the wheel.
Wrapping Up
Winter lay-up isn’t glamorous, but it’s the cheapest insurance a skipper can buy. Tackle the fuel, water, and corrosion threats one by one, and your inboard will spin to life when the first warm Saturday calls. Need a safety net? Sea Tow® captains stand by 24/7, ready with local knowledge, jump starts, and towing if something still goes wrong. Until then, enjoy the quiet months knowing your boat is tucked away and ready to run.

Sea Tow Team
Sea Tow has been the premier leader in on-water boating assistance since 1983. We want to share news, press, tips and all things boating.